Description
Module for integrating Zigbee or BLE devices for automation systems based on MajorDoMo. For integration, the software zigbee2mqtt can be used together with various versions of zigbee dongles, or the ready-made Smart Logic System (SLS) Zigbee BLE gateway. The module allows you to simultaneously work with an unlimited number of gateways or applications zigbee2mqtt, representing a mqtt client and a ready-made database of supported devices. Using the module eliminates the need for prescribing and memorizing device metrics.
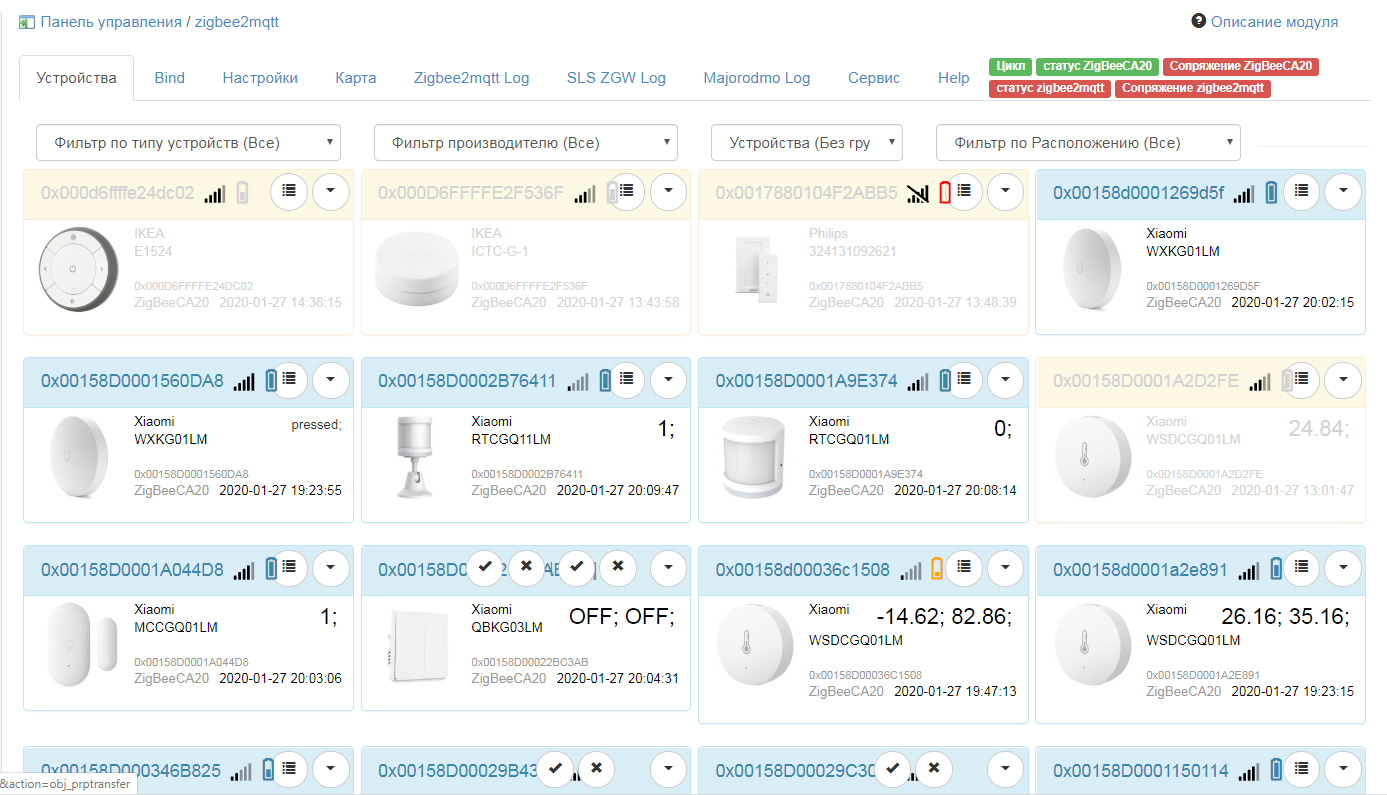
Preparatory activities
The module works through MQTT. Install mosqutto on raspberry or linux:
Mosqutto for windows can be downloaded here
For correct work with MajorDoMo, it is necessary to install the zigbee2mqtt module through the add-ons market.
After installing the mqtt broker and the add-on for MajorDomo, you need to specify the necessary settings on the Tools tab:
mqtt server address
mqtt port
if necessary, the mqtt login and password
Subscription path - the path for subscribing the module. If you use several gateways, then each of the gateways must be specified with a comma, for example, like this:
ZigBeeCA20/#,zigbee2mqtt/#ZigBeeCA20/#,zigbee2mqtt/#If zigbee2mqtt is installed on the same machine natively, or through docker, you can configure the zigbee2mqtt log to be viewed by specifying the path to the application, for example /opt/zigbee2mqtt
To view the log of the SLS gateway, you must specify its ip address in the format 192.168.1.93.
Other settings are optional.
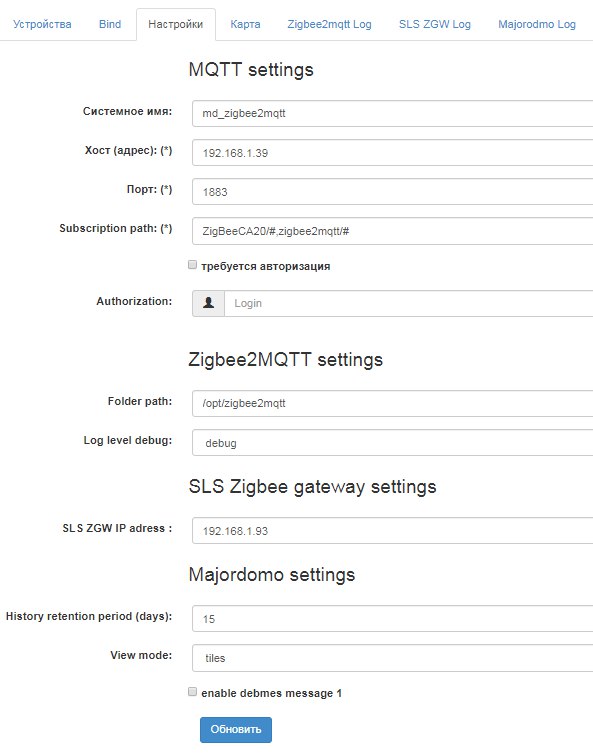
After clicking the save button, the zigbee2mqtt cycle restarts. Its status can be viewed in XRAY on the Services tab. If necessary, it can be restarted or stopped there.
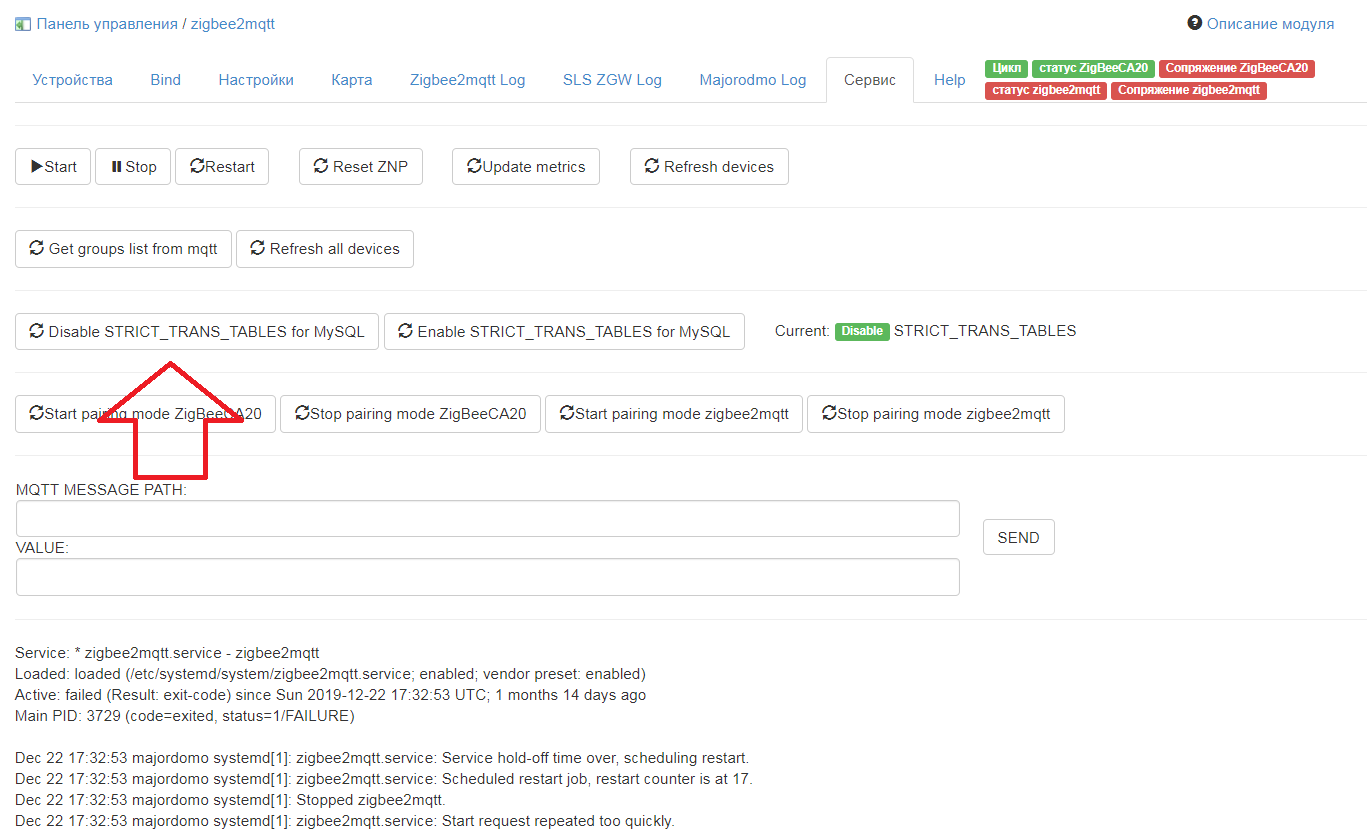
** For the module to work correctly, you need to click the Disable strict mode button on the Tools tab - this will turn off the strict mode of the MySQL server. **
Adding (pairing) devices
To add Zigbee devices, you must enable pairing mode on the gateway. This can be done through the Web interface of the SLS gateway, or from the MajorDomo module. The mode is switched on the Tools tab, or by clicking on "Pairing [gateway_name]". When the pairing indicator is green, the gateway is ready to pair. For gateways based on Zigbee 3, the maximum allowed pairing mode time is 5 minutes.

After turning on pairing mode, you must press the reset button on the device in accordance with the instructions. You can find out how the device can be put into pairing mode in the [zigbee2mqtt] directory (https://www.zigbee2mqtt.io/information/supported_devices.html).
Device management from the control panel
Managed devices can be given commands in the admin panel of the module for MajorDoMo. For such devices in the upper bar are the control buttons in accordance with the type of device. Clicking on the corresponding icons changes the mode.
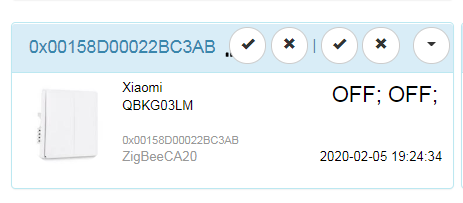
When you click on the picture of the device, the "toggle" command is sent, which changes the mode to the opposite.
Device management through applications
The module management interface is accessible from applications. So, having installed the application for Majordroid phones, the mode of simplicity and device management will be available through the applications.
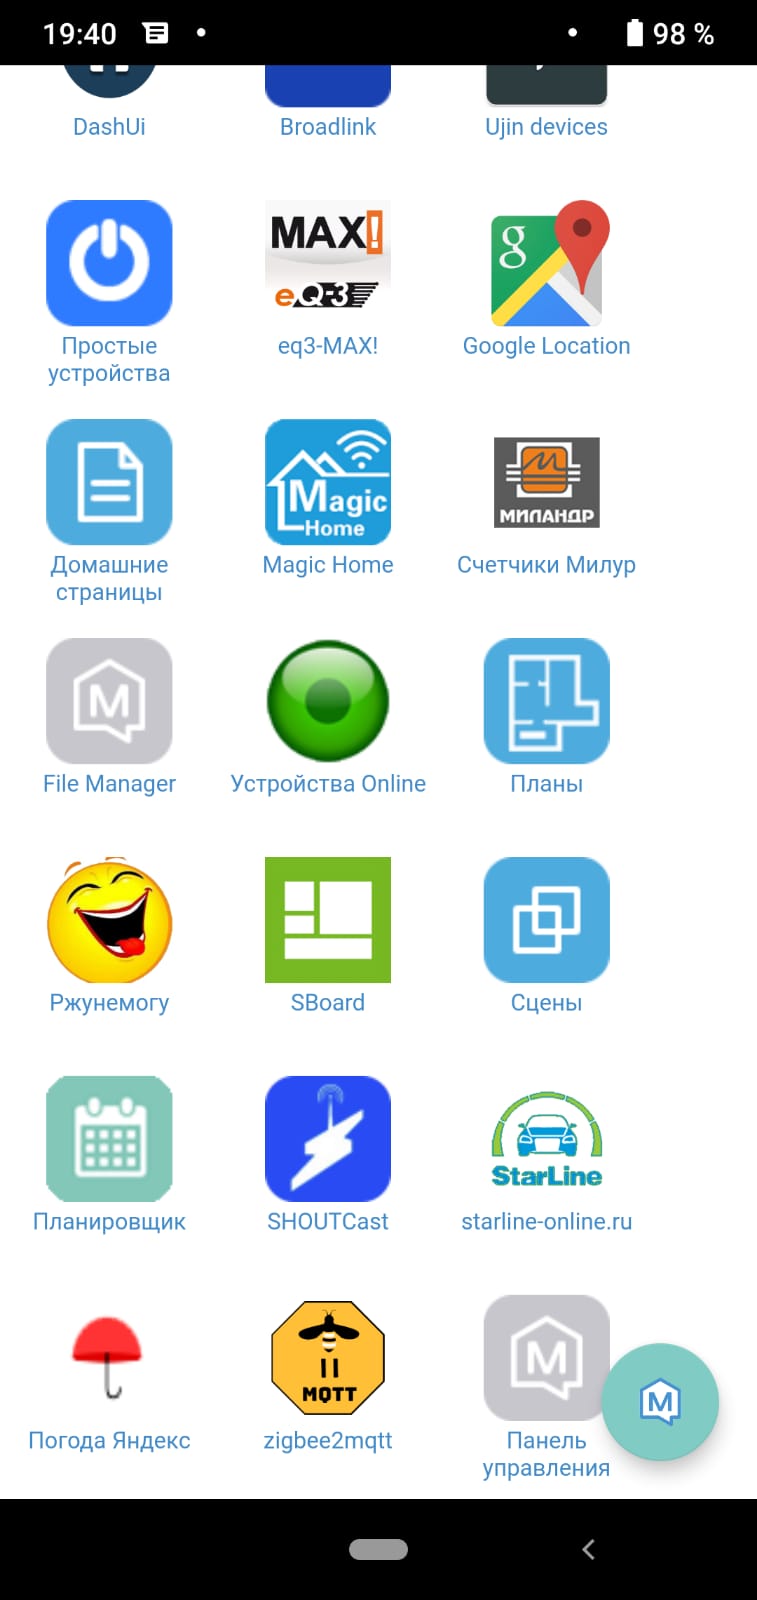
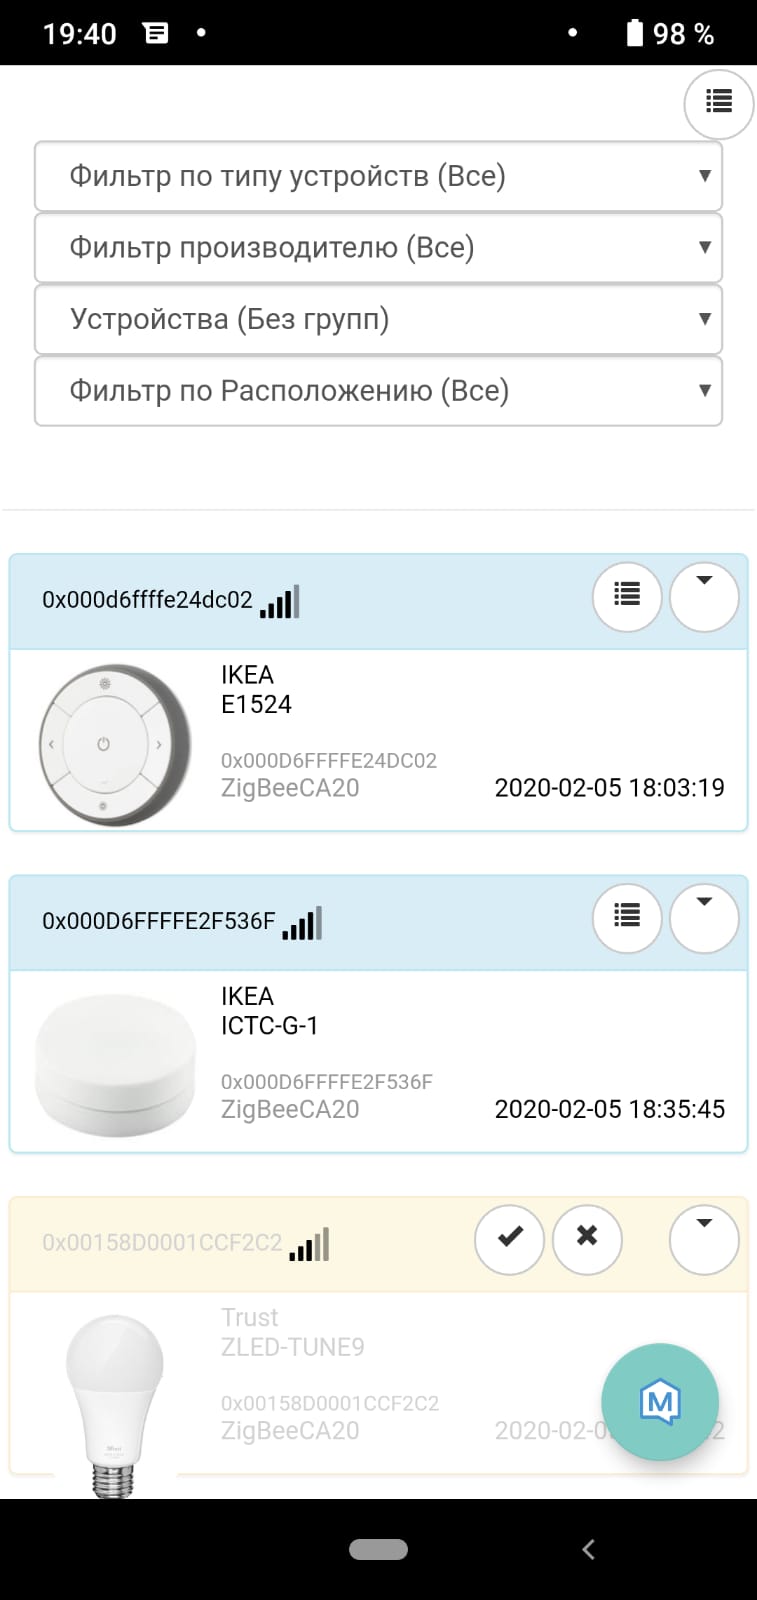
Also, the permanent page of the add-on http: /ipaddr/module/zigbee2mqtt.html can be set in the browser or your home page.
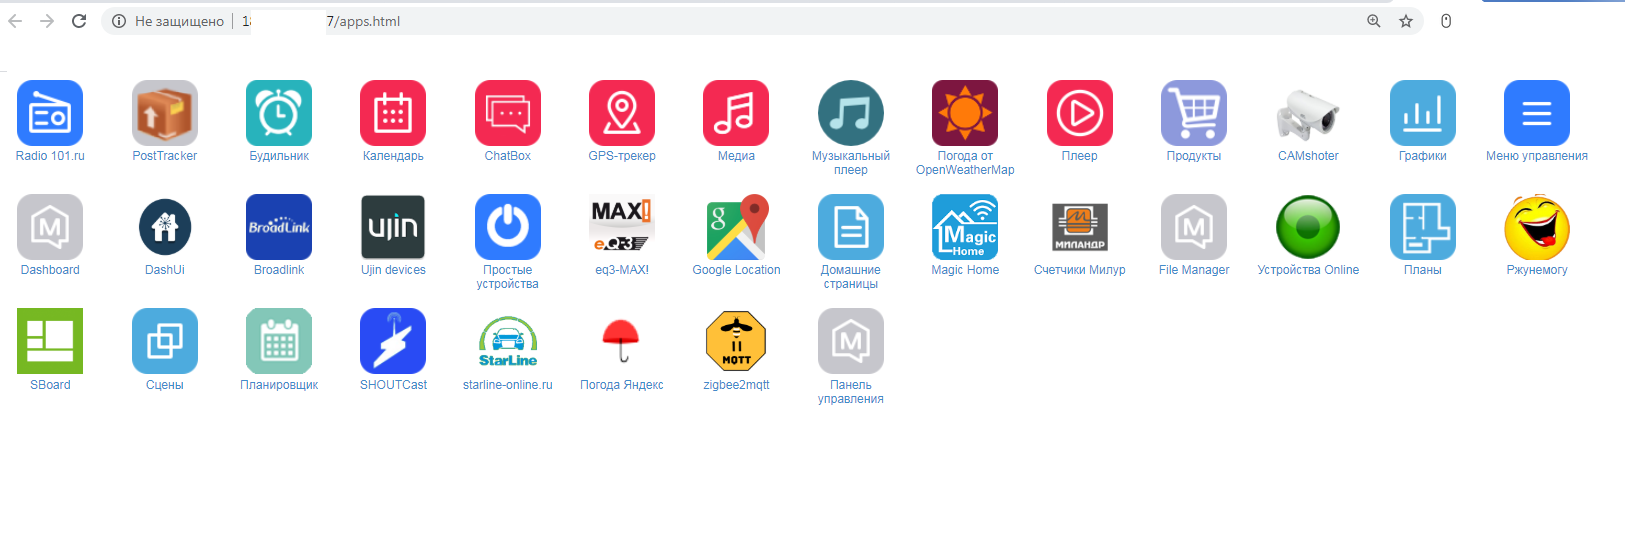
You can also control devices from here. The link to this page can be set as the home page on a wall-mounted tablet or similar device on the home network.
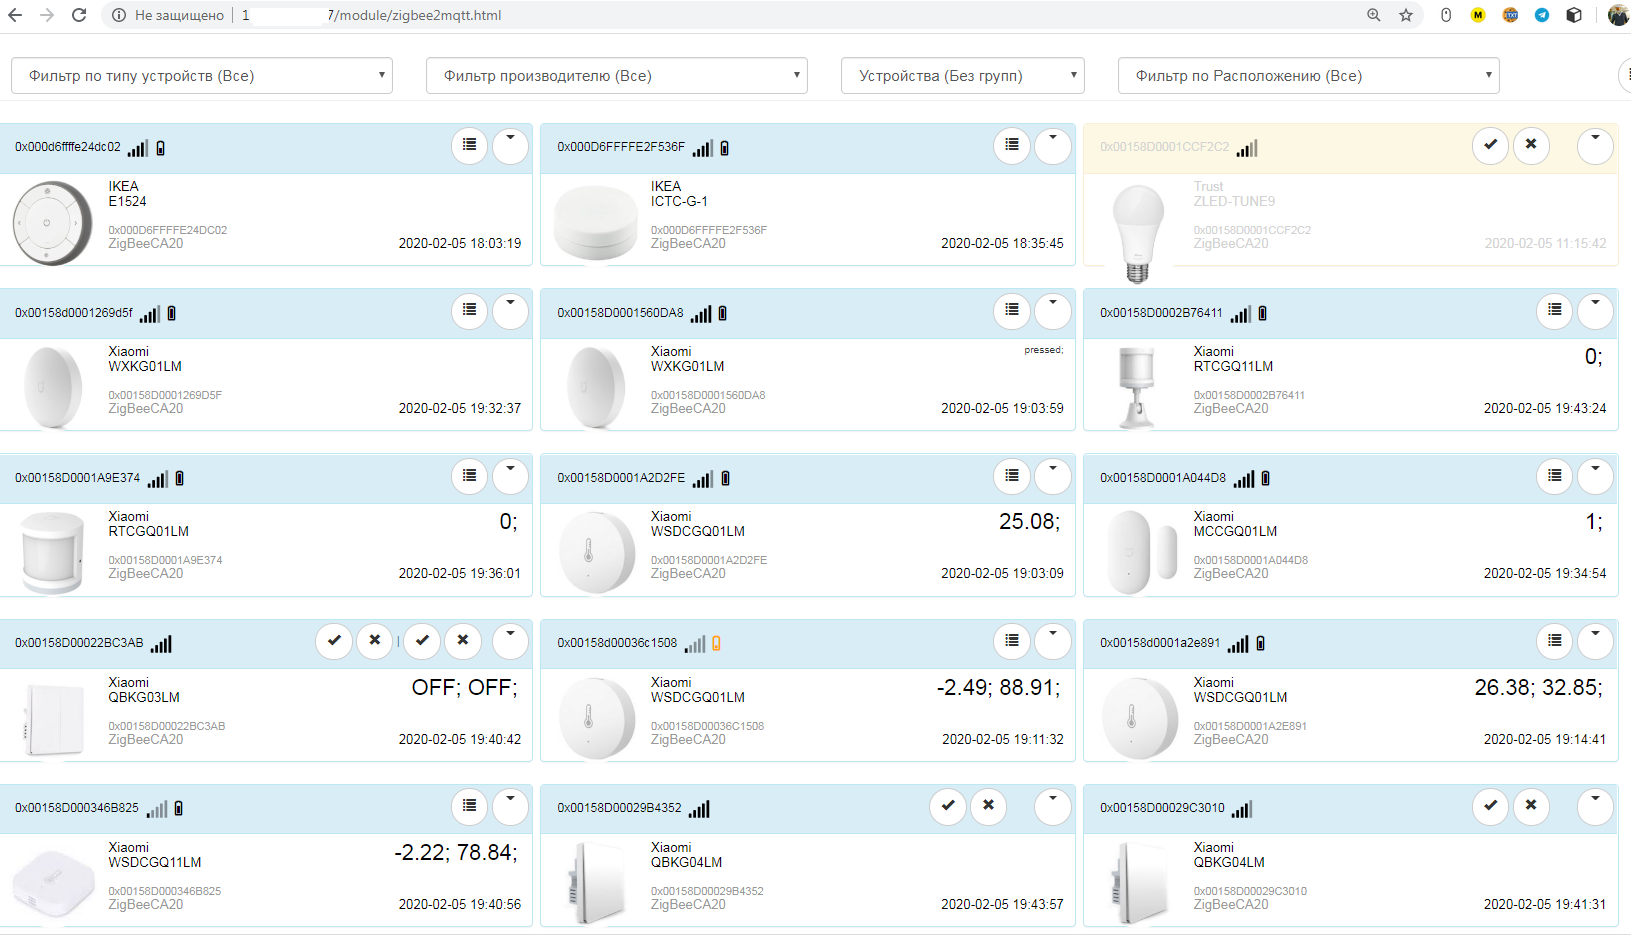
Binding devices to objects
The zigbee2mqtt add-on is integrated for integration with "Simple devices" MajorDoMo. Through the “Simple devices” tab in the admin panel, you need to select and add a device that is meaningful to the system (for example, “Motion Sensor” or “Controlled Relay”)
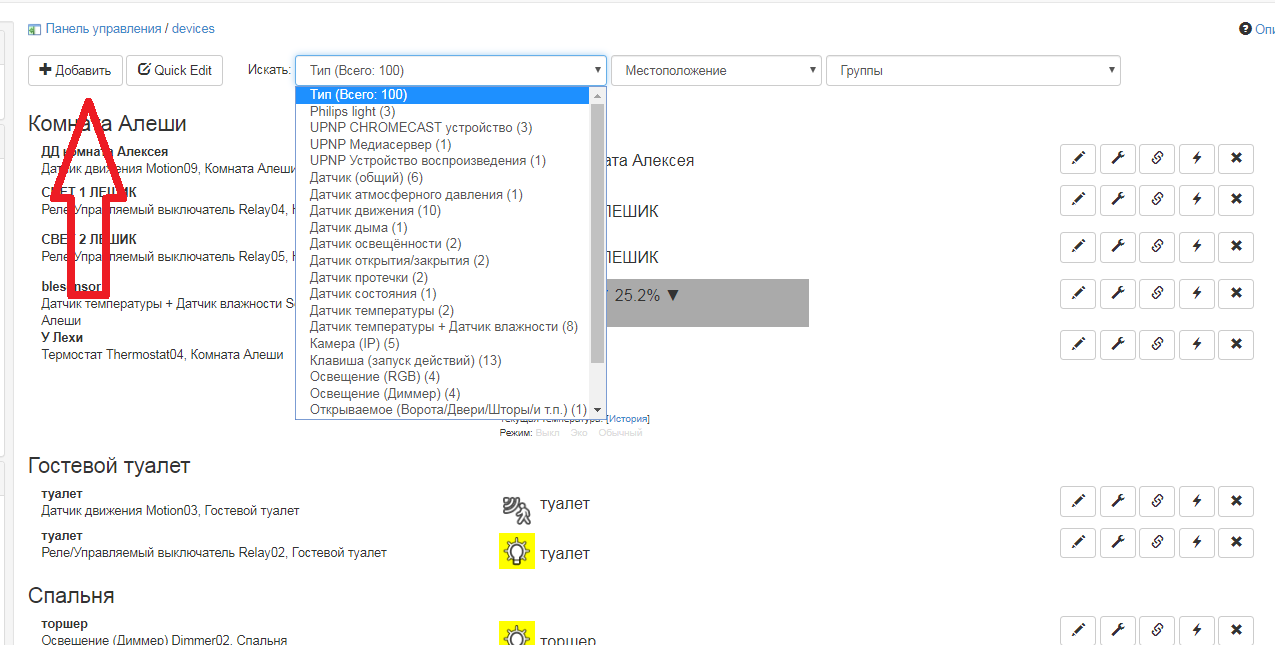
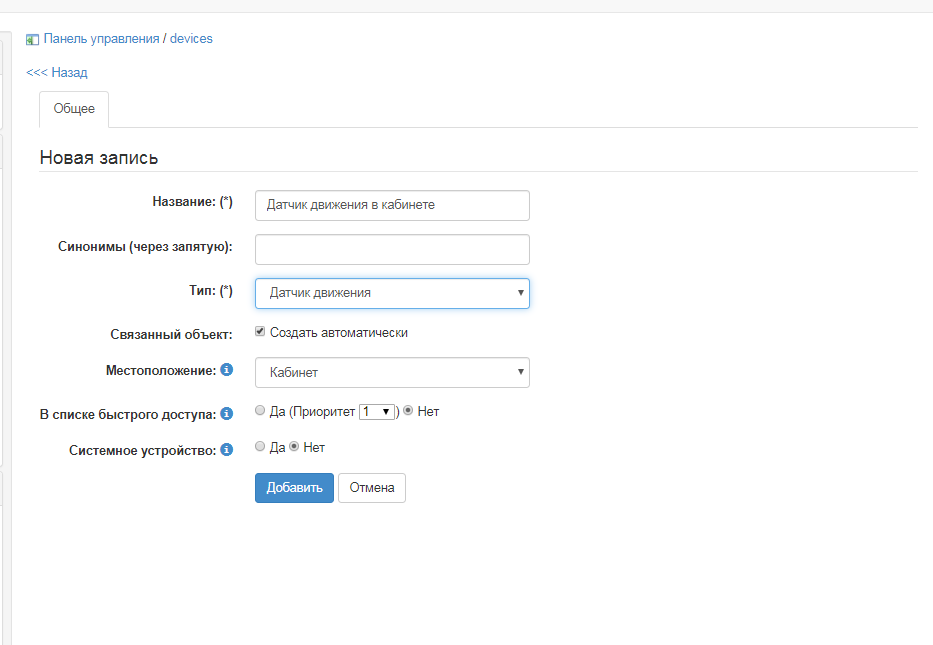 After adding it, you need to find out and remember the name of the associated object:
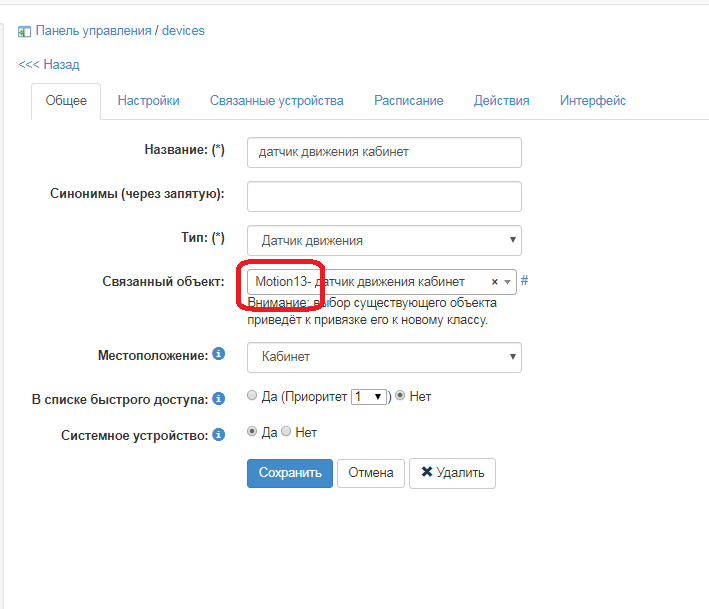
Now, in the admin panel of the zigbee2mqtt module, you need to find the desired device and go to the "Data" tab: 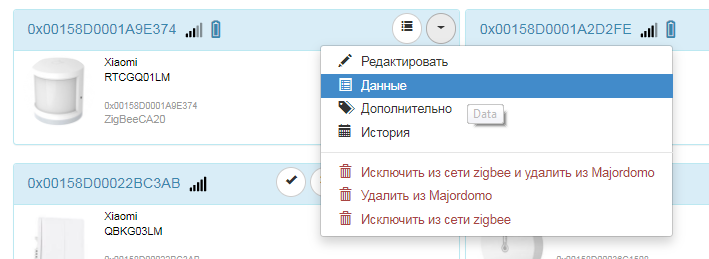
Select the appropriate device metric: ![sd2] (/img/sd4.png) And bind the previously created object as in the picture: 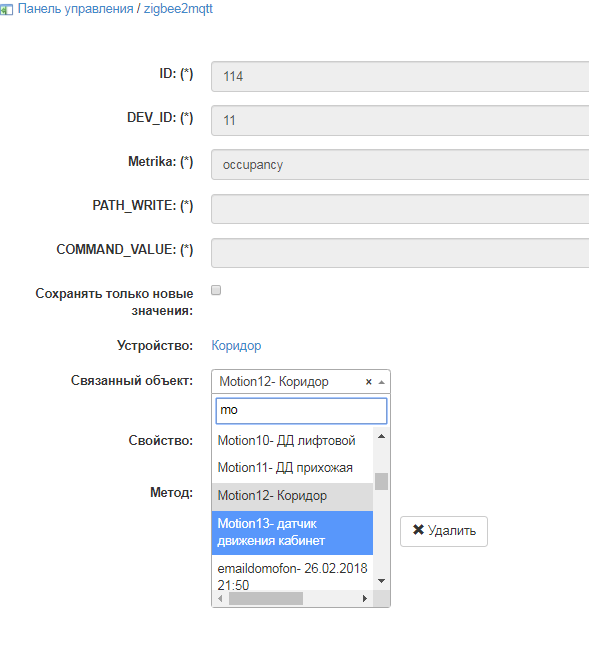
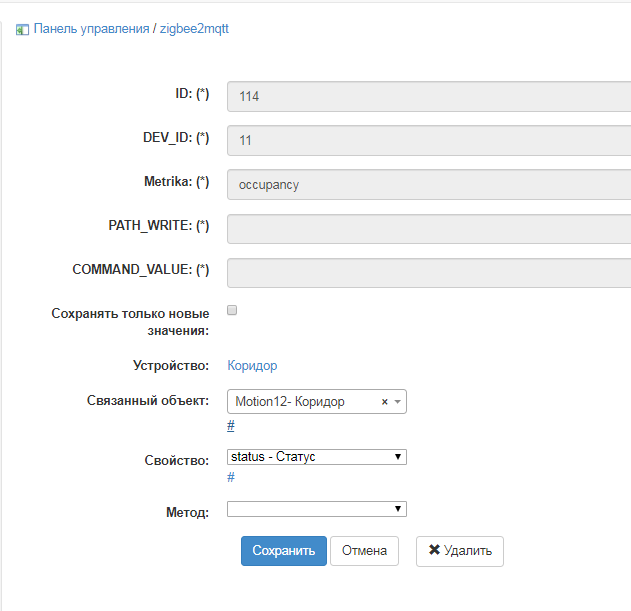
Your device’s metrics are now linked to MajorDoMo’s logic. Your device’s metrics are now linked to MajorDoMo’s logic. You can receive appropriate notifications, configure reactions, manage devices using the available tools, including using voice commands
** Please note that click, command, etc. metrics received from remote controls. turn around. This allows you to use different settings for the supported commands (double tap, double tap, long press, etc.). You need to bind the necessary command, for example single (double, long) instead of the click metric. If you bind click to the desired action, the event will be executed for each action (click, release, etc.). 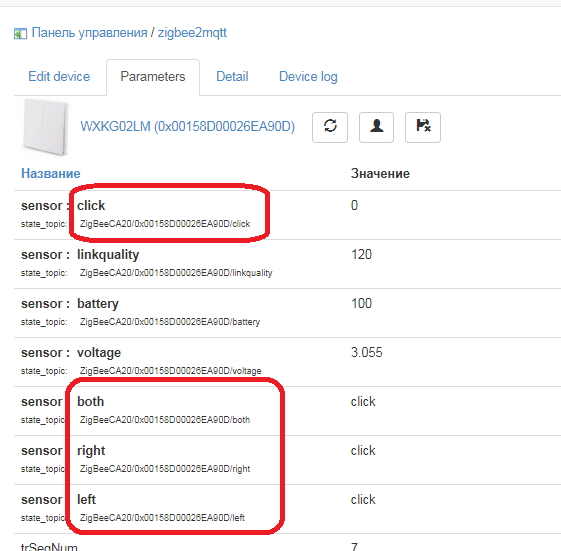
** It is also worth noting that for "Simple devices" such as relays, dimmers, etc. it is better to bind the switch method, then the control logic will be respected. For sensors, you must bind the appropriate metrics. **
** Attention!!! The simultaneous binding of a method and a property for buttons will cause a double trigger.
Groups
Grouping devices allows devices to subscribe to group commands, thereby eliminating the need for a user or home automation system to send commands to each device. Also, the response time of devices is much faster than cyclic sending.
Adding devices to groups is done from the Edit Device tab. You can create a new group or choose from the existing ones.
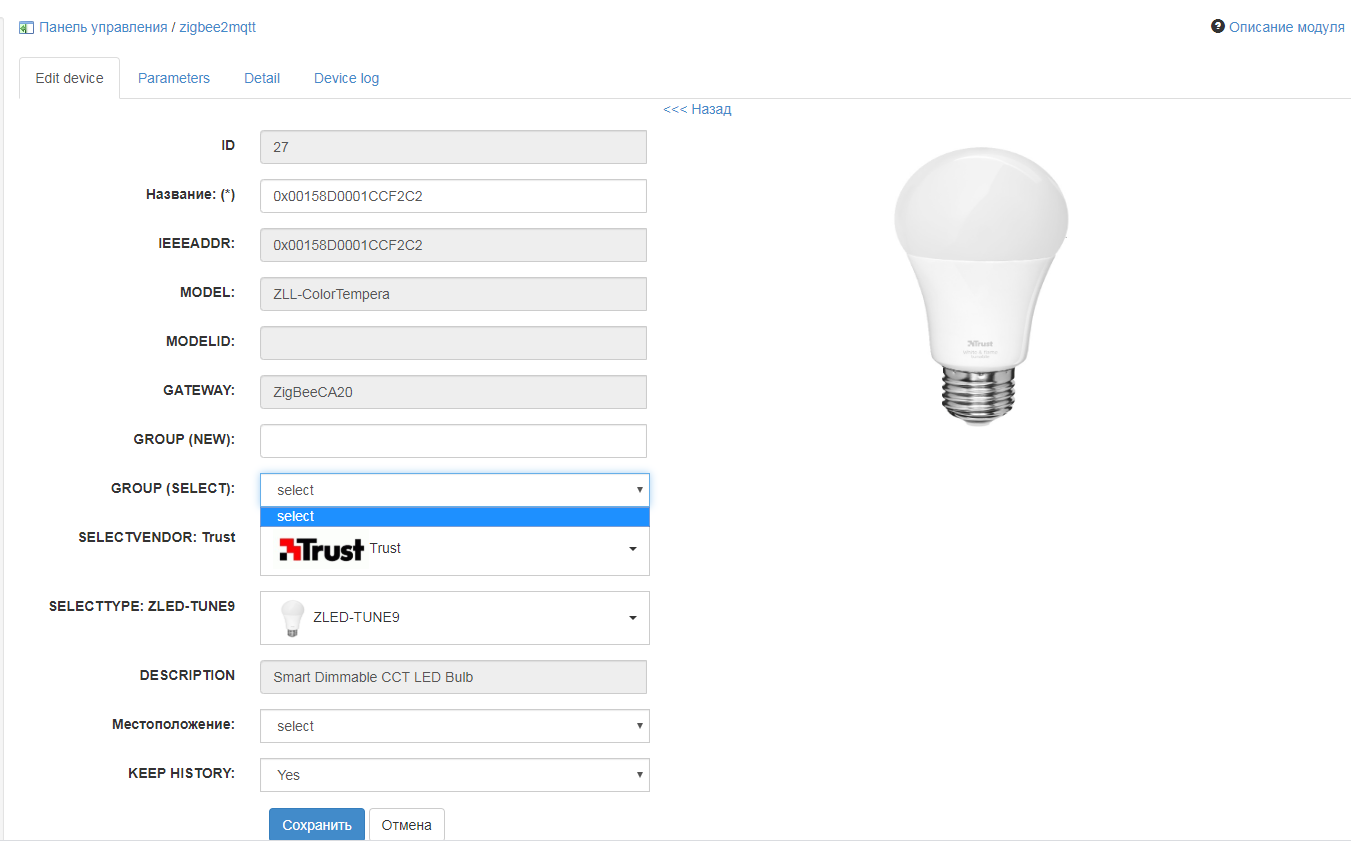
Then, according to the zigbee2mqtt protocol, a new device is created with the group name. By sending one command to a group, you can change the operation mode of all devices included in it.
The zigbee protocol provides for device support in multiple groups. You can re-read the list of groups where the device belongs from the Parameters tab
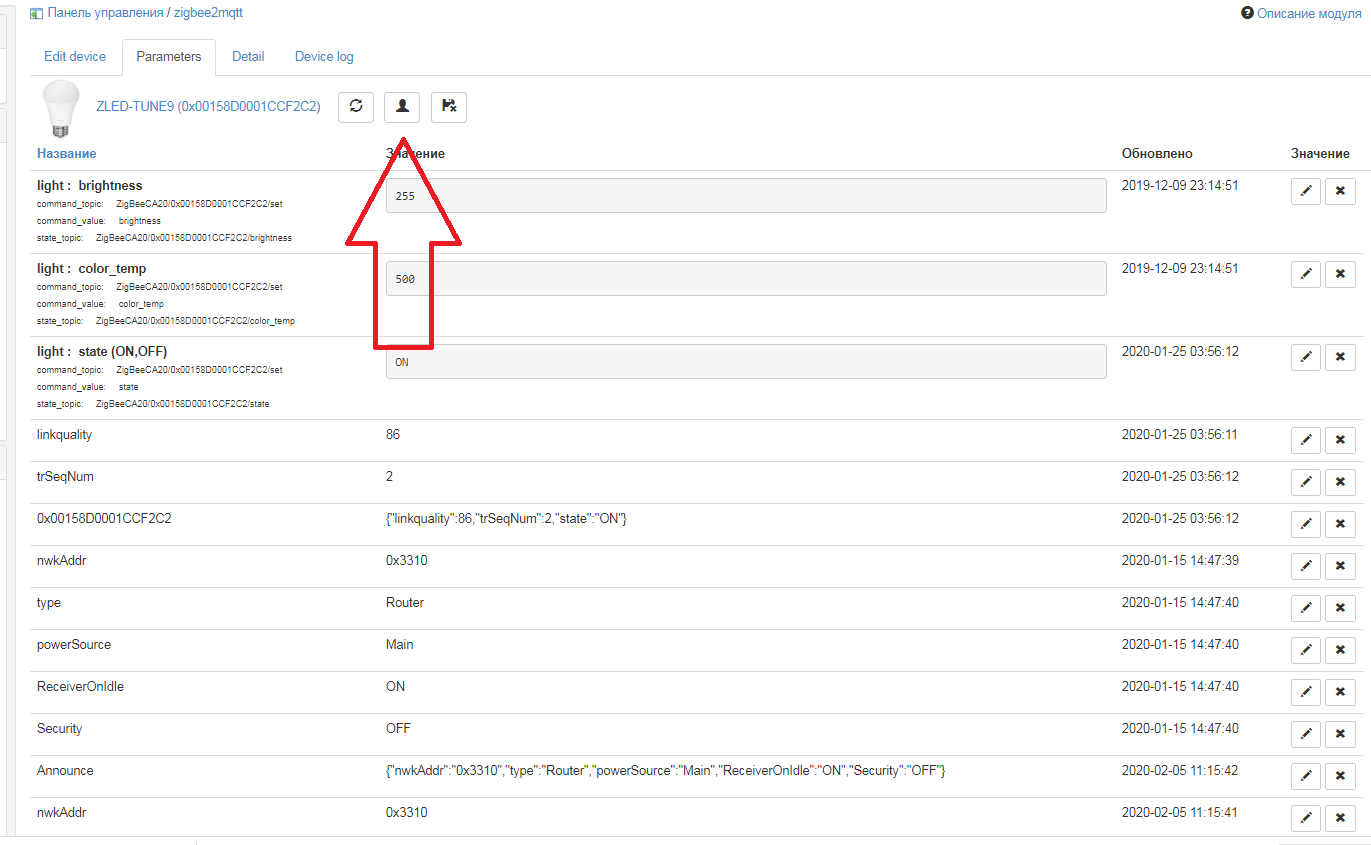
In the admin panel, you can select the "only groups" display mode. 
TouchLink
The zigbee protocol provides device management without a coordinator. TouchLink technology allows you to create a separate zigbee network between two devices. For communication supporting technology devices, you should familiarize yourself with the documentation. Ikea stores sell Tradfri lamp and remote control kits that support this pairing. Usually to pair the lamp and the remote control, you need to bring the remote control to the included light and press the pairing button. After some time, the lamp will blink with increasing frequency. After some time, the blinking will stop, the devices will need to create their own network and register for device events.
#Binding The zigbee protocol also provides settings for device communications with the coordinator. This technology is called Binding. It allows you to similarly sign some devices (lamps) to others (remotes, sensors), only configuration is done through the coordinator. This allows you to fine-tune communications without creating a separate zigbee network.
View zigbee2mqtt or SLS ZGW logs
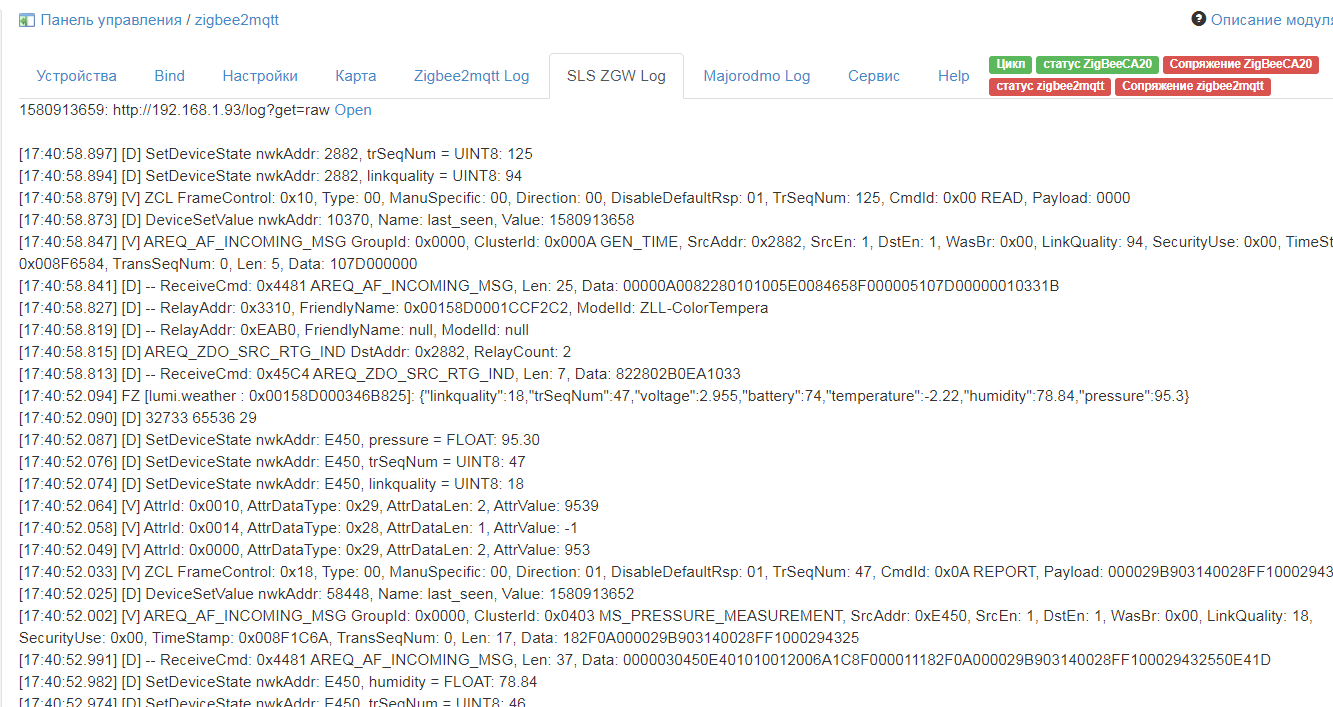
In addition to MajorDoMo, you can view the log file of the software gateway. If zigbee2mqtt is installed on the same server where MajorDoMo is installed, you need to specify the path where zigbee2mqtt is installed on the Settings tab in the Folder path field. The default instructions are installed in the / opt / zigbee2mqtt folder. As a result, viewing the zigbee2mqtt log file becomes available.

For the SLS hardware gateway in proxy mode, viewing the operation log is available. It is necessary to specify the IP address of the gateway on the Settings tab in the SLS ZGW IP adress field. View is available on the SLS log tab.
Example Majoromo script to reboot the gateway
include_once (DIR_MODULES. 'zigbee2mqtt/zigbee2mqtt.class.php');
$ z2m = new zigbee2mqtt ();
$ z2m-> sendcommand ('ZigBeeXXXX/reboot', '');
include_once (DIR_MODULES. 'zigbee2mqtt/zigbee2mqtt.class.php');
$ z2m = new zigbee2mqtt ();
$ z2m-> sendcommand ('ZigBeeXXXX/reboot', '');An example of a Majoromo script for installing the backlight of a modernized Aqara gateway
include_once (DIR_MODULES. 'zigbee2mqtt/zigbee2mqtt.class.php');
$ z2m = new zigbee2mqtt ();
$ z2m-> sendcommand ('ZigBeeXXXX/led', '{“mode”: ”manual”, ”hex”: ”# FF0000”}');
include_once (DIR_MODULES. 'zigbee2mqtt/zigbee2mqtt.class.php');
$ z2m = new zigbee2mqtt ();
$ z2m-> sendcommand ('ZigBeeXXXX/led', '{“mode”: ”manual”, ”hex”: ”# FF0000”}');Useful links
Link to an interesting thematic channel in telegrams: https://t.me/zigbeer
Link to the zigbee2mqtt module repository: http://github.com/directman66/majordomo-zigbee2mqtt/
Topics for managing devices through mqtt https://www.zigbee2mqtt.io/integration/home_assistant.html
Topics for gateway management through mqtt https://www.zigbee2mqtt.io/information/mqtt_topics_and_message_structure.html#zigbee2mqttbridgelog

 SLS Smart Home